 Make.com
Seamless automation awaits you with our Make.com Integration! ⚙️
Introduction:
Welcome to Picnie, where image generation is effortless. In this step-by-step guide, we will walk you through integrating Picnie with Make.com, allowing you to automate the storage of generated images. This integration unlocks limitless opportunities for sharing, tracking, and organizing your visual content efficiently.
Step 1: Accessing Picnie Dashboard
Begin by logging in to your Picnie account. You can use your email and password or opt for the quick Google login option.

Step 2: Exploring the Picnie Dashboard
Once logged in, start by exploring the Picnie dashboard. Before setting up the integration, navigate to your profile and retrieve your API key, which will be essential for the integration process. After obtaining your API key, proceed to the next step.
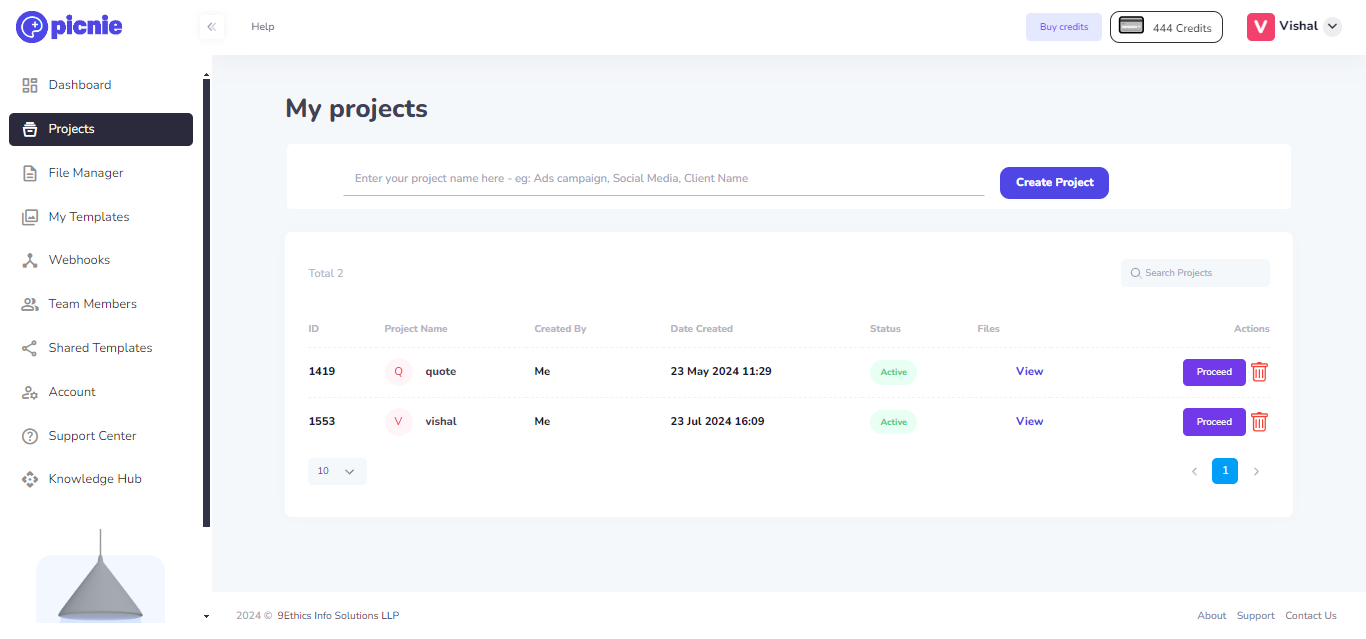
Step 3: Setting Up Make.com
Once you've retrieved your API key from the Picnie dashboard, head over to Make.com. If you don't have an account yet, create one by following the simple signup process. After creating your account, log in to Make.com to start building your integration.
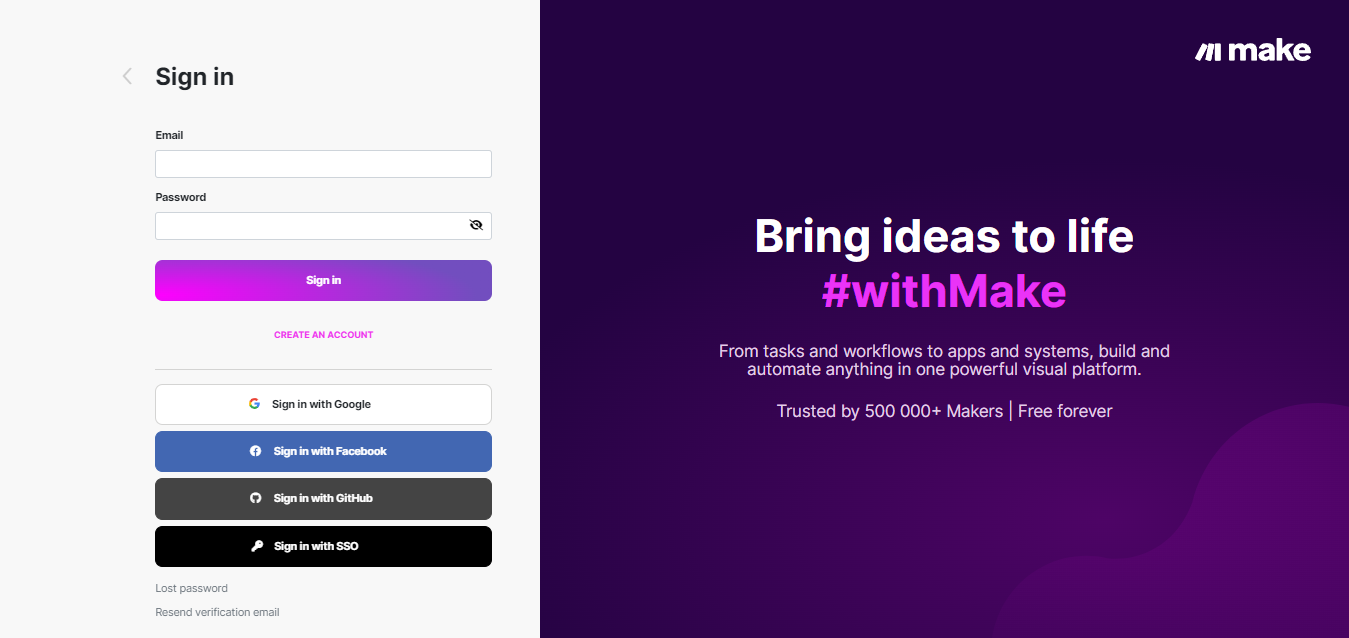
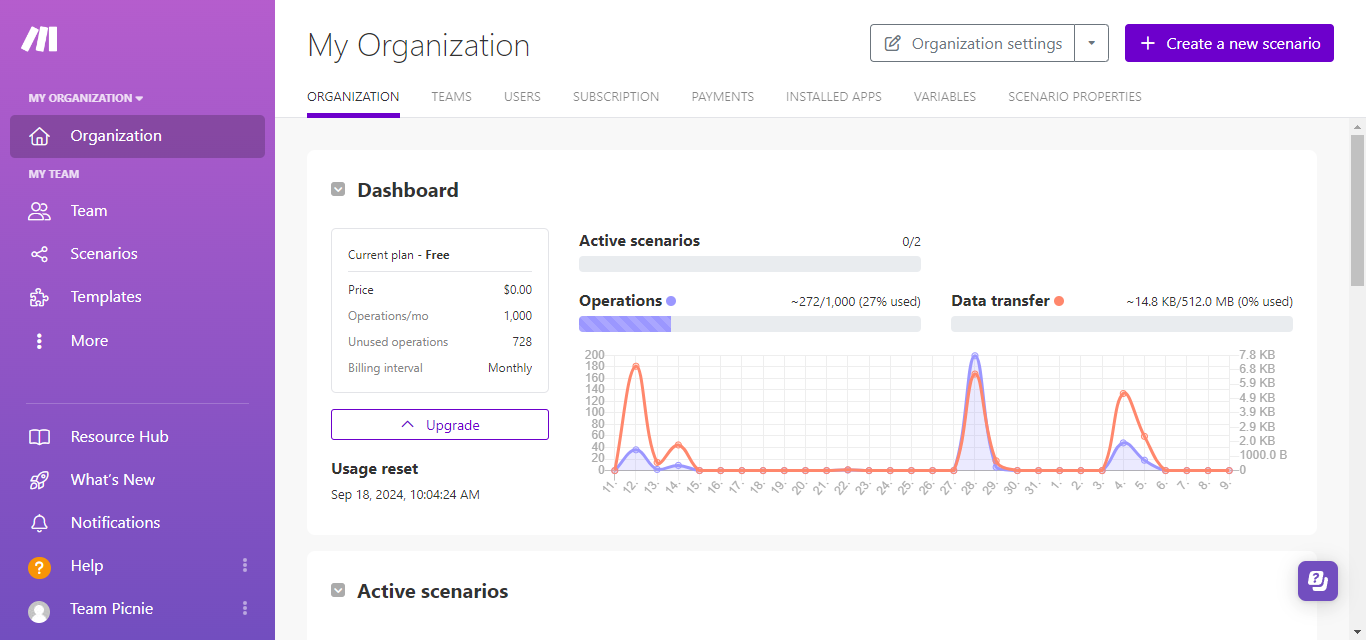
Step 4: Creating Scenerios
After logging into Make.com, it's time to create your first scenario. Scenarios are automated workflows that connect Picnie to other apps or services. To create one, click the "Create a new scenario" button in the dashboard. You'll then be prompted to choose a modules, such as a webhook, to initiate the workflow. From there, you can add actions like Create an Image, Merge Two Images, Resize an Image etc. in Picnie. Customize your scenario by linking multiple apps to automate tasks and let Make.com handle the rest!
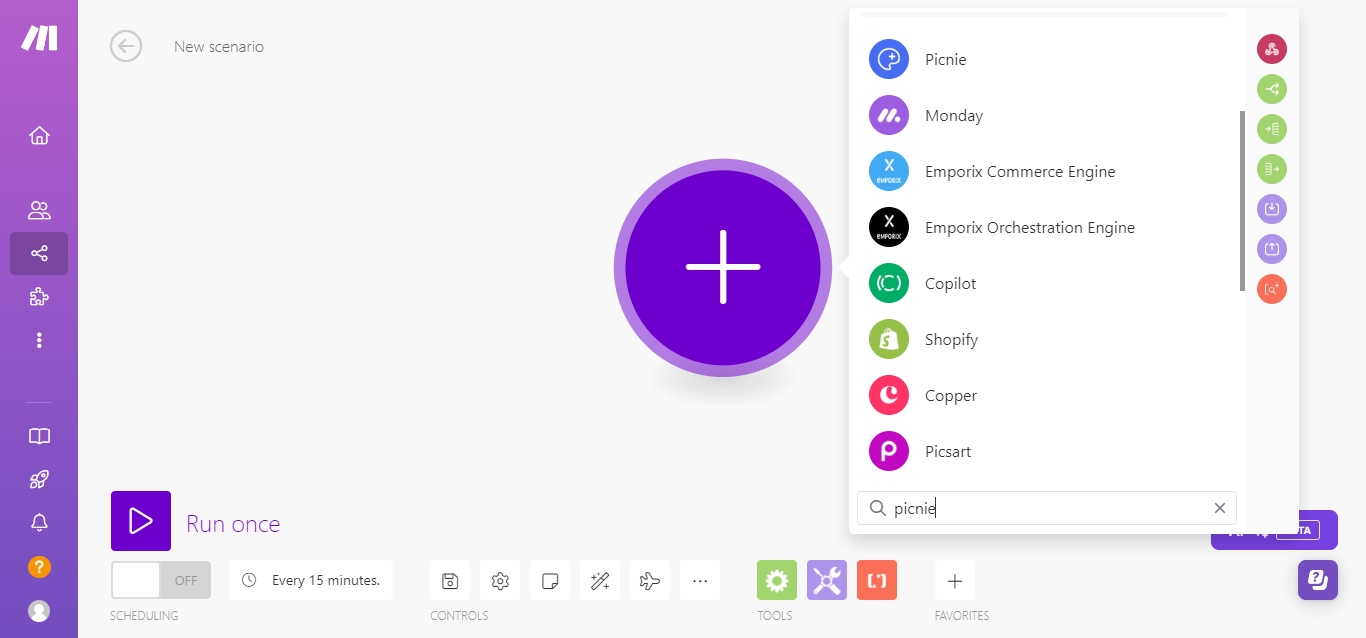
Then after clicking Picnie you will come across the multiple modules that can be used to create image, resize image, compress image and many more...
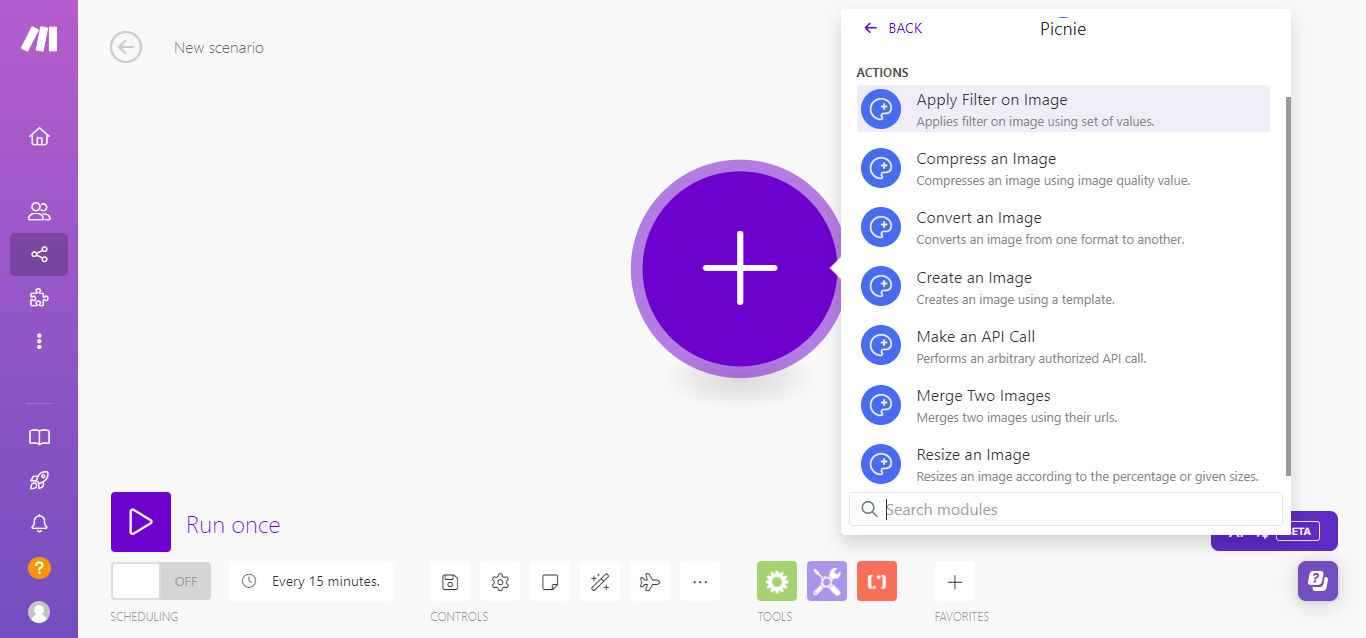
Step 5: Selecting and configuring the module
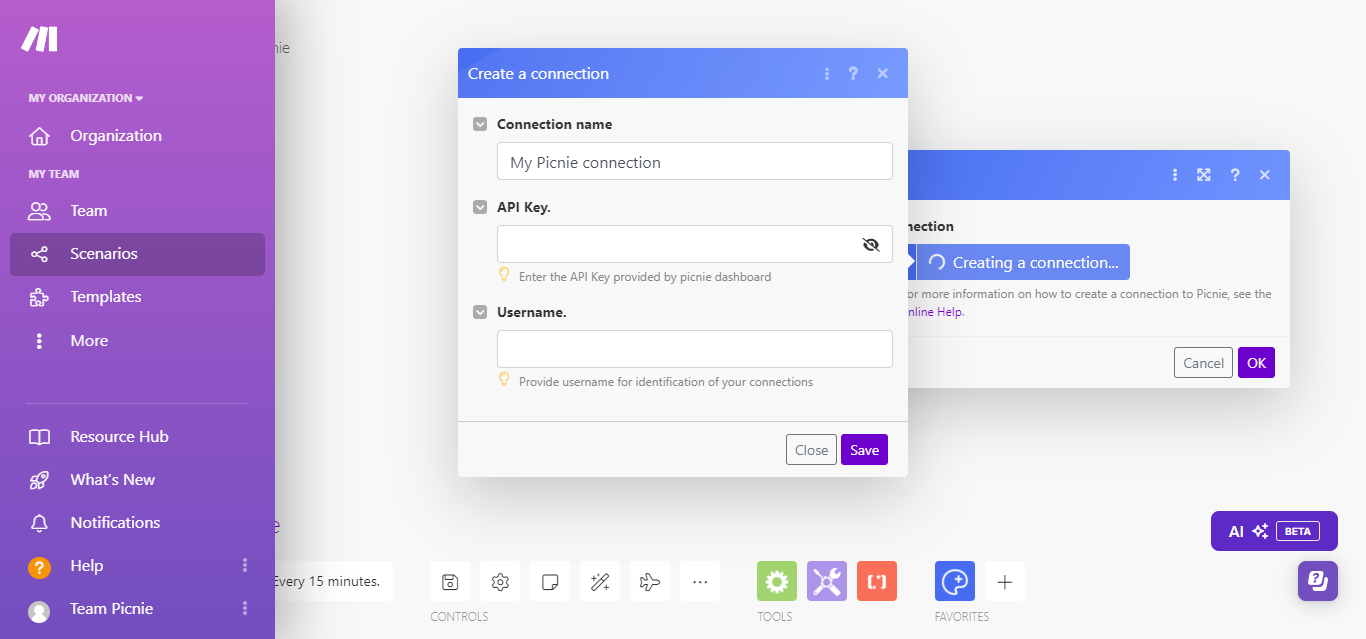
Start by choosing the required module for your scenario, such as the "Create an Image" module, which will capture data from Picnie and generate an image based on the given fields in the api. After selecting the module, configure it by pasting the API key and your username you retrieved from your Picnie profile. Then, map the data fields you'd like to send from Picnie, such as Project ID, Template ID, Template Name etc. Once configured, you can add additional modules for further actions, like "Resize an Image", "Convert an Image", "Compress an Image", "Merge Two Images" etc. Let's go through the "Create an Image" module usage.
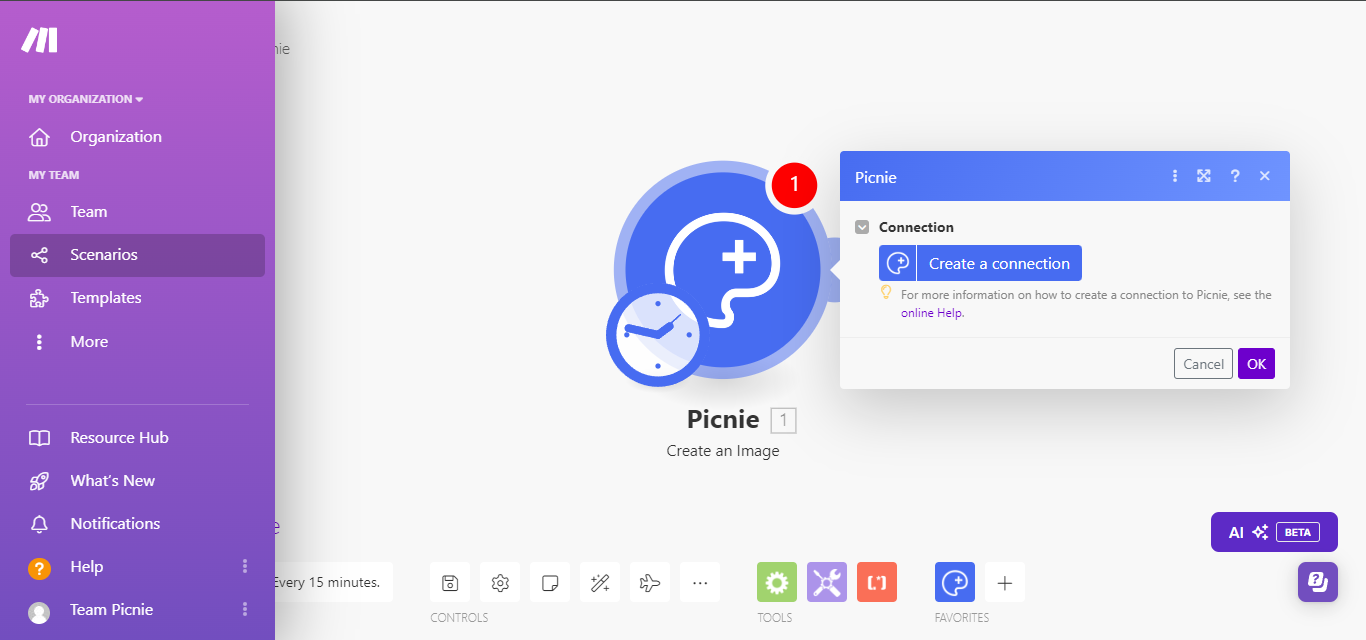
Enter Your api key provided by the Picnie dashboard and username
Step 6: Entering Data to the fields
Now that you've selected and configured your module, it's time to enter data into the required fields. Here's how:
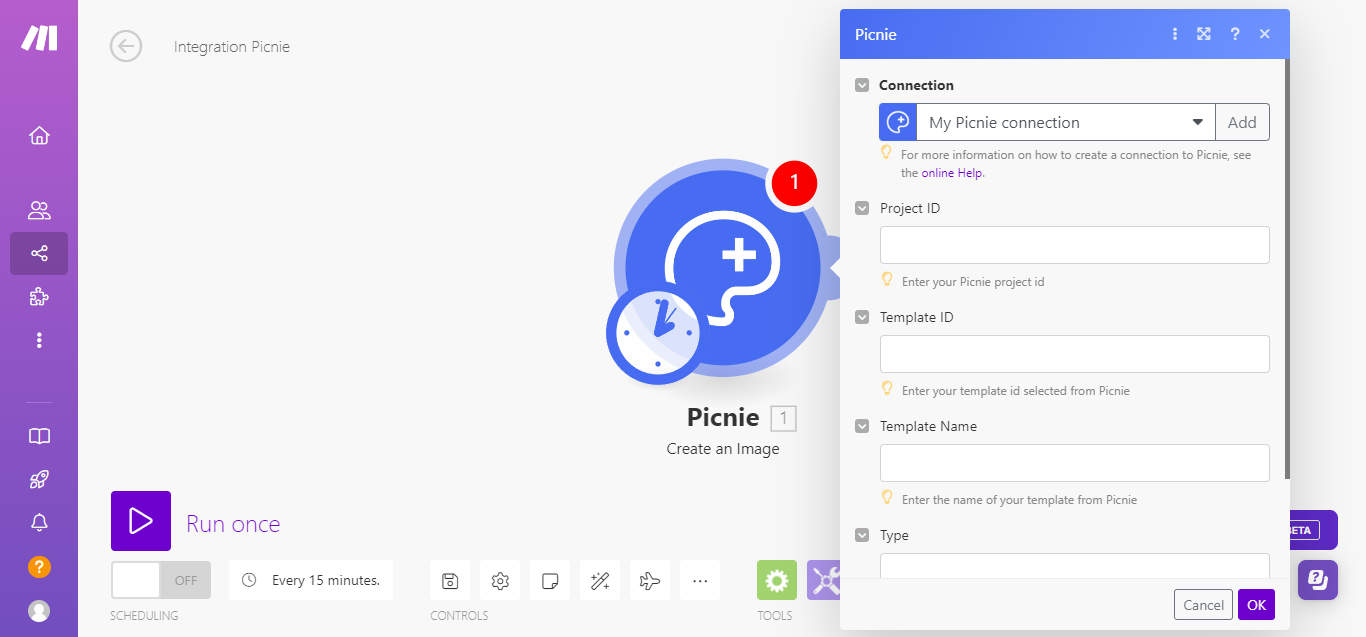
1-Project ID: Enter the Project Id of your created project from the Picnie dashboard.
2-Template ID: Enter the Template Id of your selected template from the Picnie's templates.
3-Template Name: Enter the name of your selected template from the Picnie's templates.
4-Type: Write "image" in the type input field.
5-Details: Click on Add item then the three input fields will appear in one block :
a> For the first block write "background_image" in the "Name" field and enter the image url in the "Image Url" field and leave the "Text" field empty.
b> For the other blocks apart from first block write "Title_0" or "Title_1" in the "Name" field and enter the custom text in the "Text" field and leave the Image Url field empty.
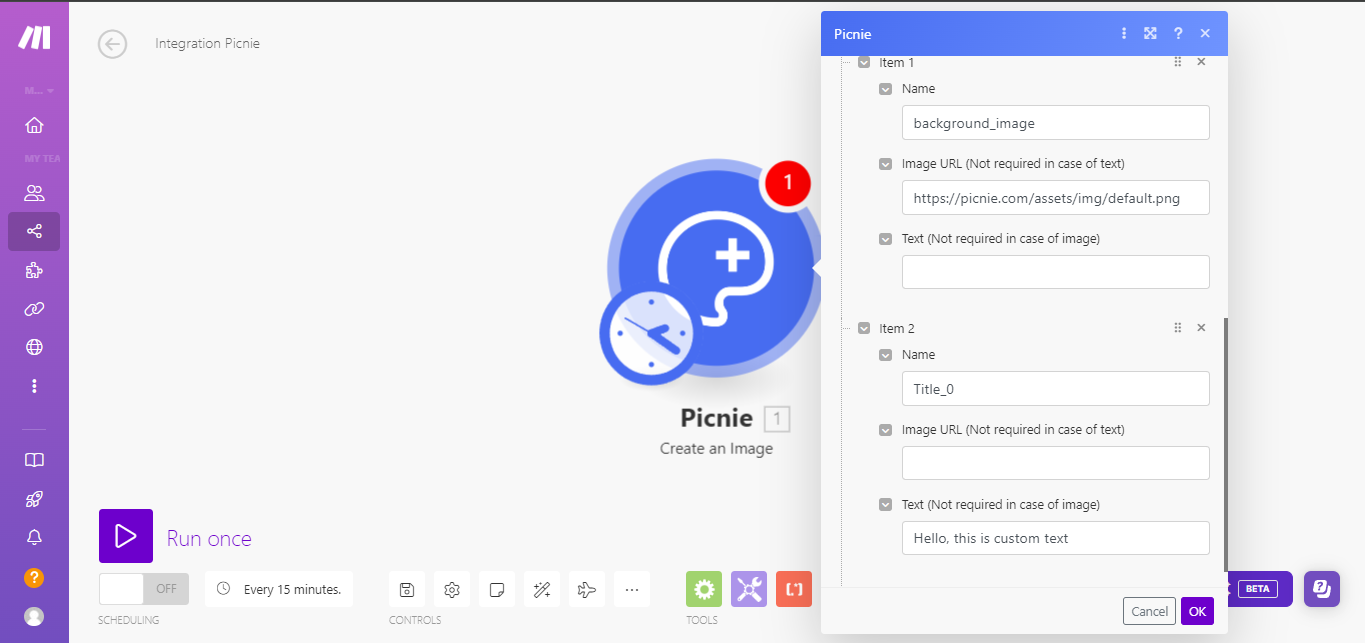
6-For more Information: Refer to the REST API tab of "Templates > Single Image Generation" of your selected template.
7-Submit: Click on Ok after filling the form.
8-Mapping values: The values of the input fields can also be mapped with the output of the previously linked module in the scenerio.
Step 7: Running the scenerio
Once you've entered and configured all the necessary fields in your scenario, the next step is to run it.
1-Test the Scenario: Click the "Run once" button at the bottom of the scenario builder to perform a test run. This will allow you to see if the scenario is set up correctly and if the data flows smoothly between Picnie and Make.com.
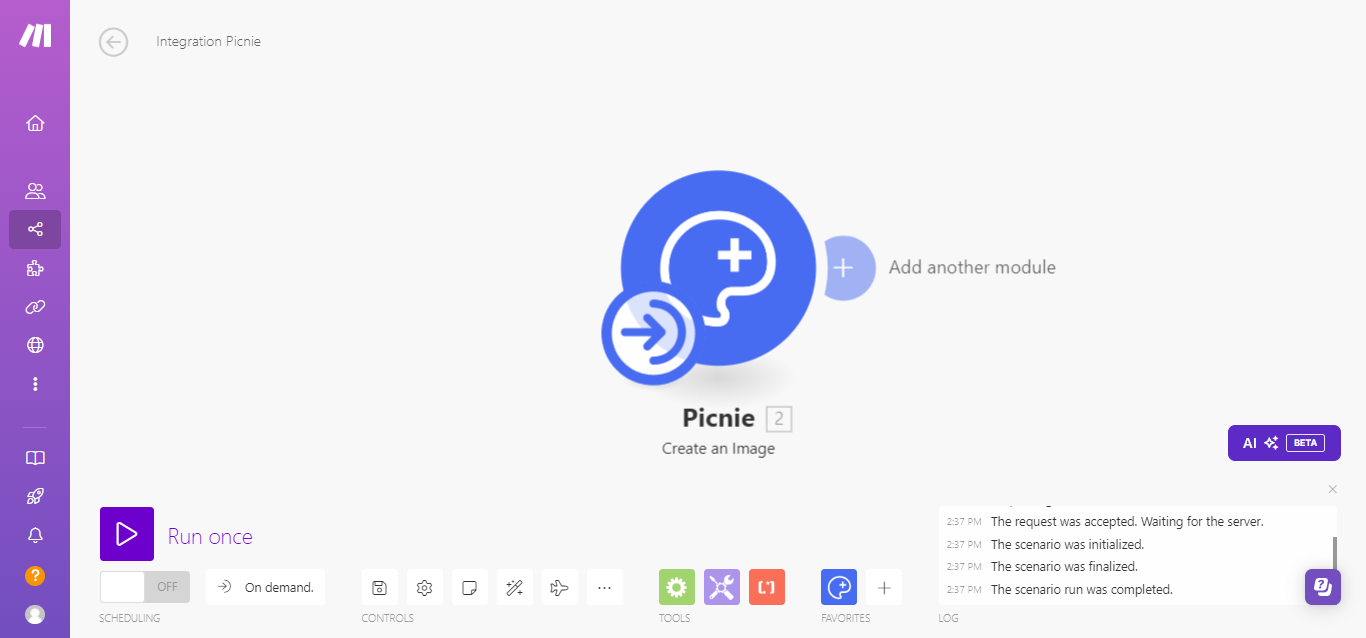
2-Review the Output: After the test run, check the output generated, such as the response image url. If everything looks correct (e.g., the image is generated with the correct background and text), you’re ready to proceed.
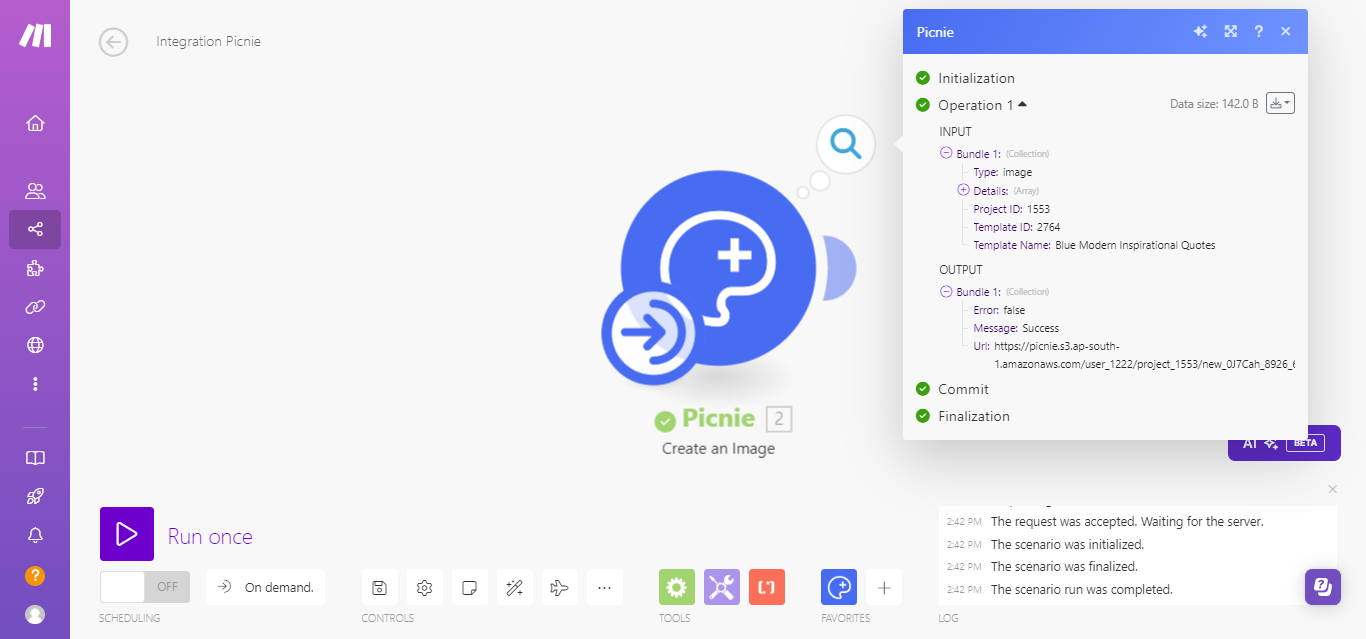
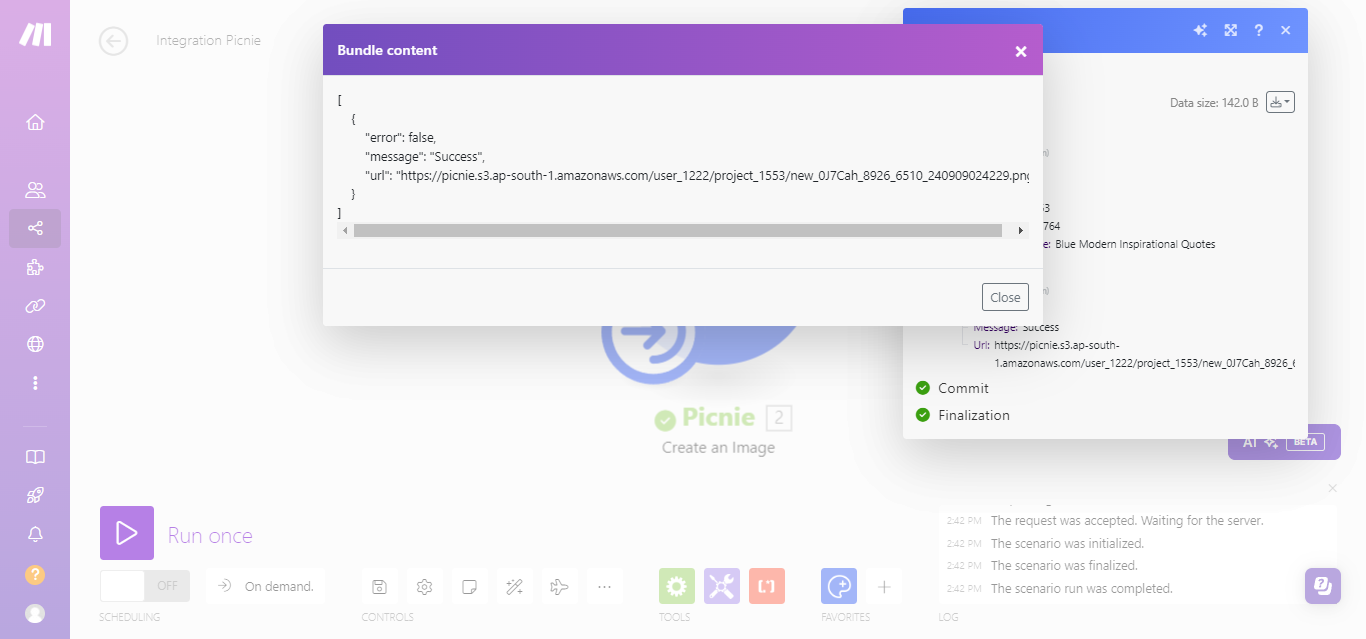

3-Turn on the Scenario: Once the test is successful, click the toggle switch to turn on your scenario. This will allow it to run automatically whenever your trigger conditions are met, such as new data coming from connected app.
Step 8: Other Modules and Public Apis
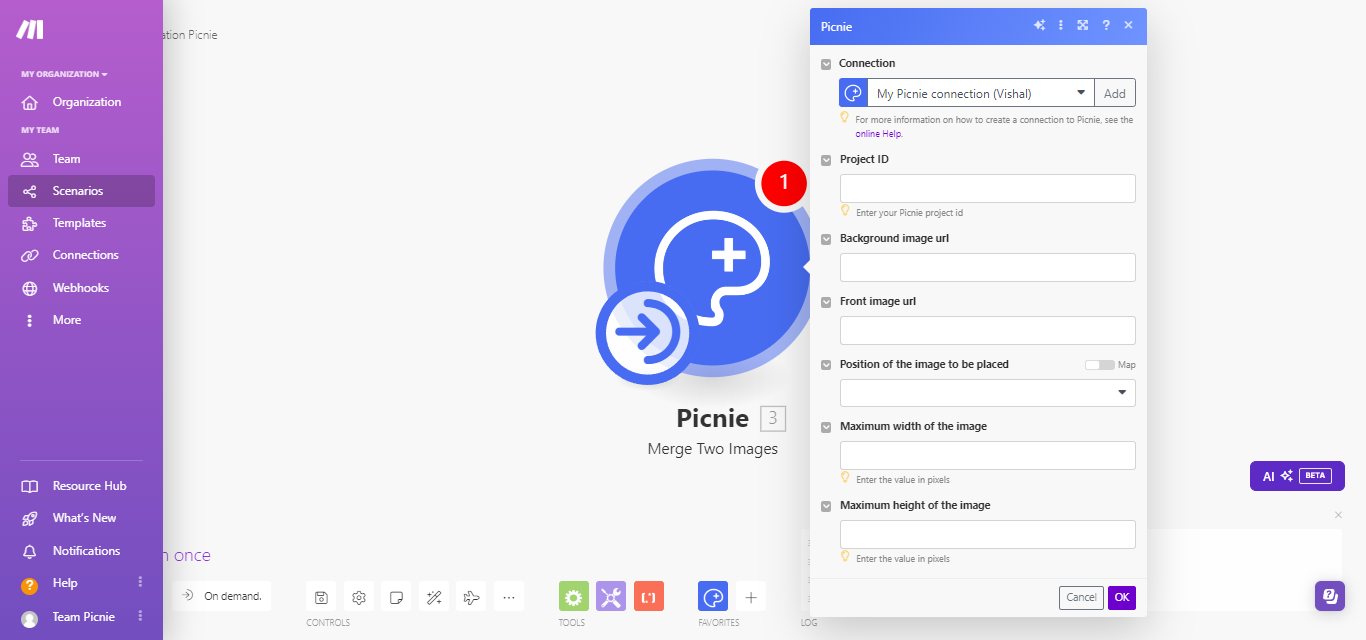
Merge Two Images : This API is used to add watermark Logo/Image to another image. You can merge two images using this API. You can add positions like tl(top left), tc(top center), tr(top right), ml(middle left), mc(middle right), bl(bottom left), bc(bottom center), br(bottom right).
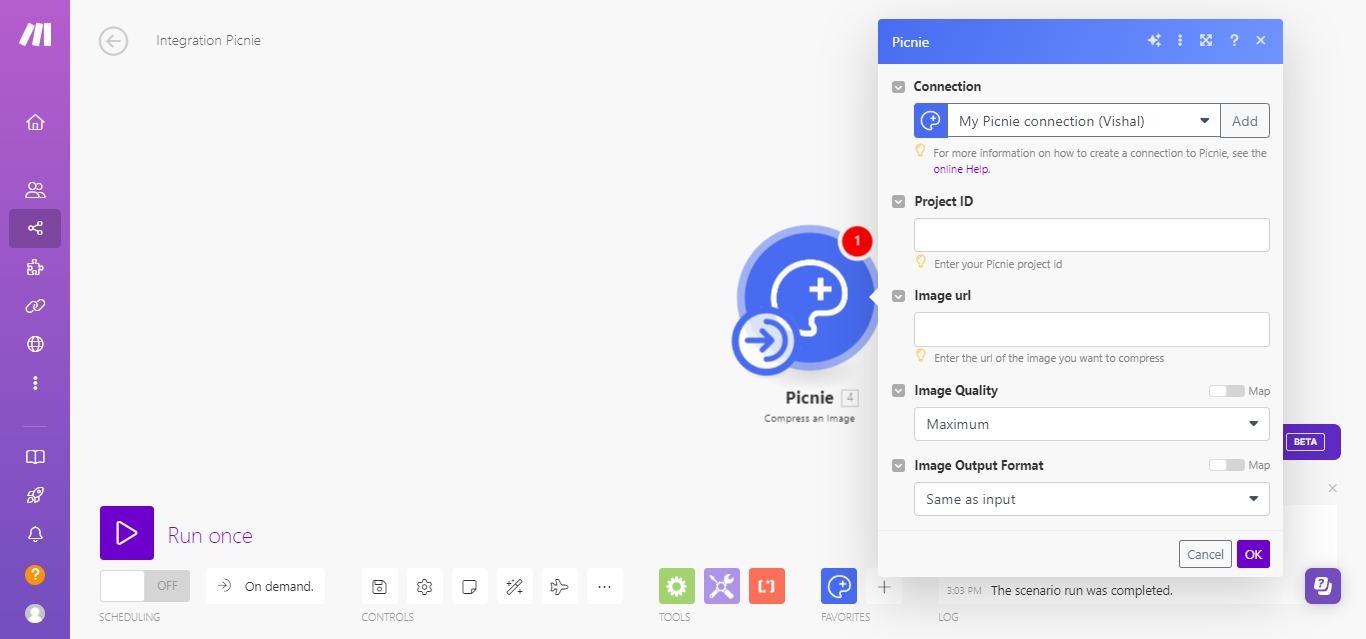
Compress an Image : This API is used to compress images without losing the quality of the image. It compress the image based on the values like 65 for Normal, 70 for Good, 75 for High and 80 for Maximum. Also user can adjust the format of the output image.
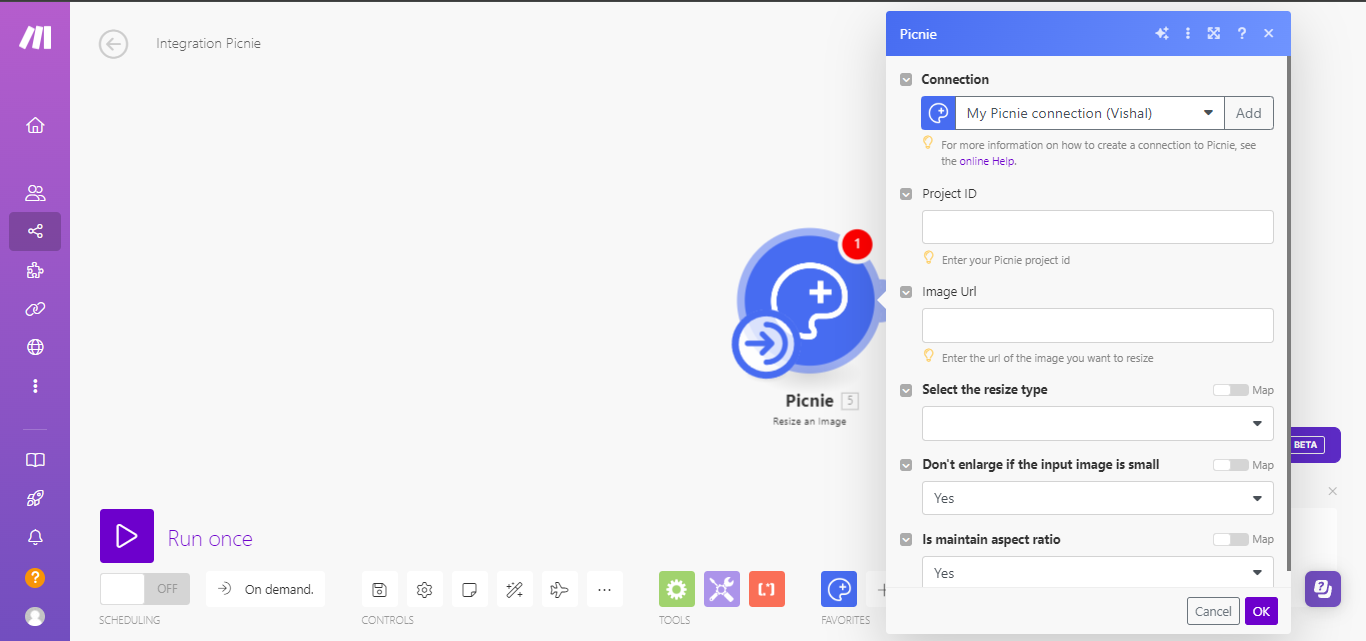
Resize an Image : This API is used to resize bulk images. You can resize image using height & width or by percentage. In this api there is a resize type parameter that has values 1 and 2, based on it the type of resize is selected. For 1 it is by width & height and for 2 it is by percentage.
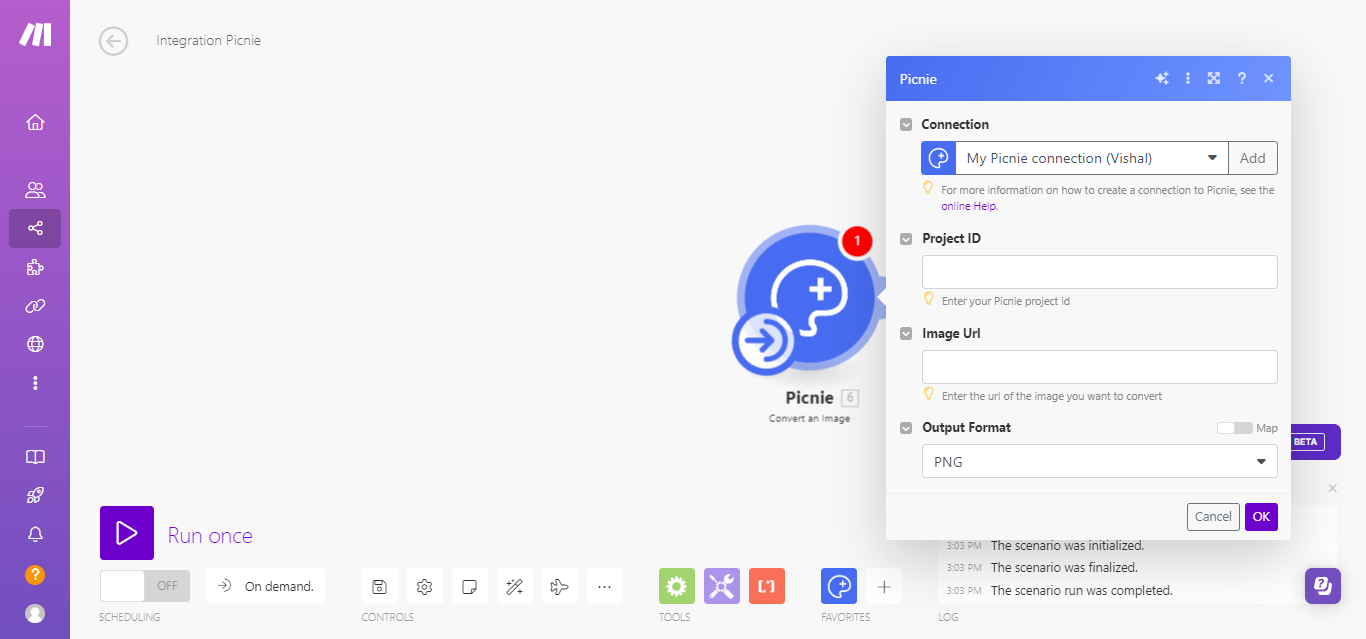
Convert an Image : It is used to convert an image from one format (jpg, png, webp) to another(jpg, png, webp).
Apply Filter on Image : This api is used to apply filter on the image using the inputs like 'IMG_FILTER_NEGATE', 'IMG_FILTER_GRAYSCALE', 'IMG_FILTER_EDGEDETECT', 'IMG_FILTER_EMBOSS', 'IMG_FILTER_GAUSSIAN_BLUR', 'IMG_FILTER_SELECTIVE_BLUR', 'IMG_FILTER_MEAN_REMOVAL'.
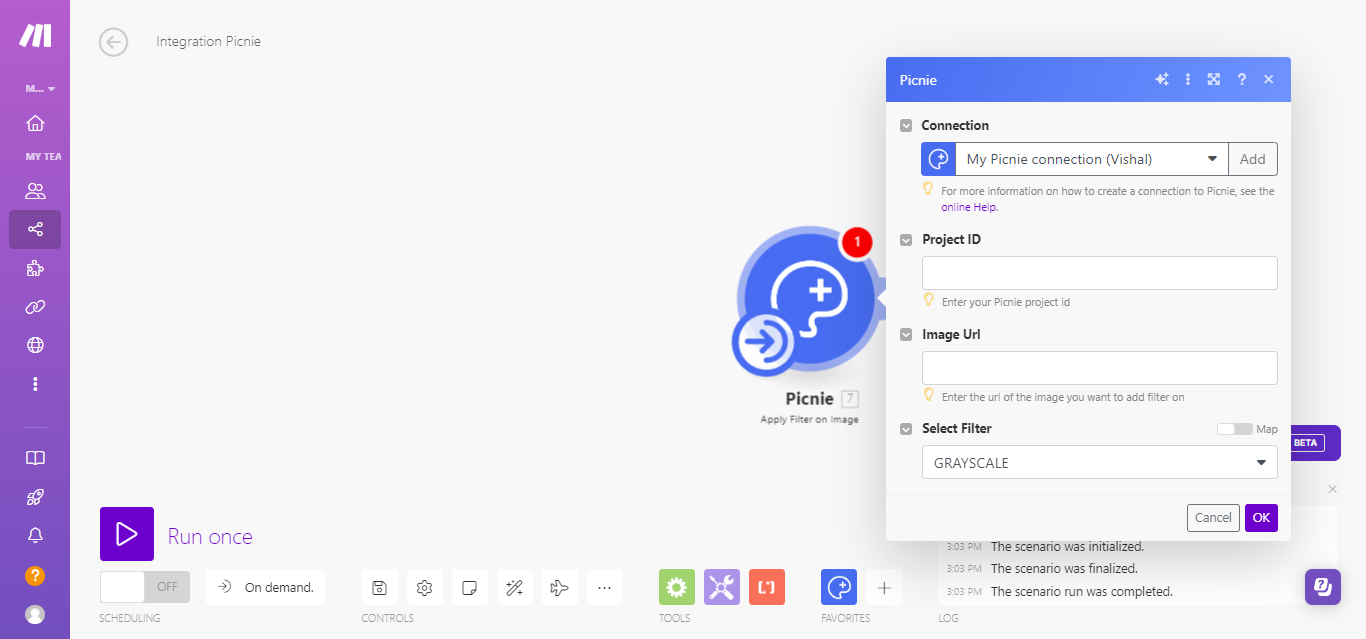
Public Apis
Conclusion:
Congratulations! You’ve successfully integrated Picnie with Make.com. By setting up this automated workflow, you've eliminated manual tasks and streamlined your image generation process. Now, whenever the scenario runs, your images will be automatically generated, customized, and stored in your desired destination, such as Google Sheets. This integration empowers your projects to run on autopilot, letting you focus on more important tasks while Make.com handles the rest. Happy automating!
